Stretching a canvas onto stretcher bars is a critical step in creating a canvas print. Proper stretching ensures the canvas remains taut and smooth, enhancing the appearance and longevity of the artwork. In this article, we’ll provide a step-by-step guide on how to correctly stretch a canvas onto stretcher bars.
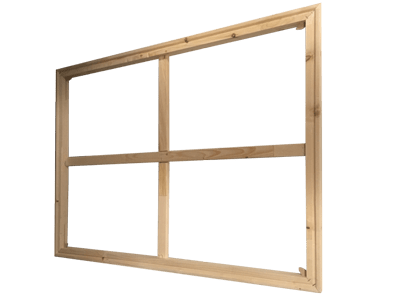
- Prepare the Stretcher Bars: Assemble the stretcher bars to form the frame. Make sure the corners fit snugly together, and the frame is square. If using cross braces for additional support, attach them across the back of the frame according to the manufacturer’s instructions.
- Cut the Canvas: Cut the canvas material with enough extra on all sides to wrap around the back of the frame. A general rule of thumb is to add at least 3-4 inches to each side, depending on the depth of the stretcher bars.
- Center the Canvas: Lay the stretcher frame face down on a clean and flat surface. Center the canvas, printed side down, over the frame. Ensure the canvas is aligned symmetrically with equal overhang on all sides.
- Staple the Canvas: Starting in the middle of one side, use a staple gun to attach the canvas to the stretcher bar. Staple the canvas at the center of each side, gradually working outward to ensure even tension. Repeat this process for the other sides, always working from the center towards the edges.
- Create Corners: For the corners, fold the excess canvas neatly to create a smooth edge. Avoid bunching or folding the canvas excessively, as this can create uneven tension. Staple the corners securely, ensuring they are flat and well-shaped.
- Tighten the Tension: Once all sides are stapled, inspect the canvas for any wrinkles or slack. Use stretching pliers to grip the canvas firmly, and gently pull the canvas towards the center of the frame to tighten the tension. Staple the canvas in place as you go, working along the sides in a consistent manner.
- Check for Even Tension: After tightening the canvas, press down on the center with your hand to check the tension. The canvas should feel firm and slightly bouncy. If there are any loose or sagging areas, adjust the tension and staple as needed.
- Trim Excess Canvas: Once you are satisfied with the tension and appearance of the canvas, trim any excess material from the edges. Use scissors or a utility knife to cut the canvas close to the staples, leaving a clean and neat finish.
By following these steps, artists and printmakers can ensure their canvas prints are securely stretched onto the stretcher bars, providing a professional and visually appealing display. Proper stretching not only enhances the artwork’s appearance but also contributes to its overall durability and longevity.
This is just an amazing way to describe the stretching canvas love your blogging section.